21 Mar 2015
Version 1.0.0 of “Count The Days Left” is now waiting for review in the app store. Hurrah!
As usual it’s a bit of a slog preparing to ship the app, but it’s finally all done, which means hopefully it’ll be available for the public in a week or so.
App Store Video production
I wanted a preview video in the app store to show off the app’s gratuitous animation. This is now easy to capture as the latest versions of MacOS support having an iOS device as a video source for QuickTime.
However, it turns out QuickTime captures my iPhone 6 at nearly 60 frames per second, but teh App Store videos must be 30fps or less.
Luckily I found a nice utility program called Prism Video File Converter Free in the Mac App Store which did a nice job of the conversion, and I could add a short preview of the app.
I made a feeble attempt at adding a sensible description of what’s a pretty simple app, and now we’re all set to go.
Call for Beta Testers
Even though the app should be available in a few days, if you want to get a preview feel free to mail me and I’ll set you up in TestFlight.
Next steps
- Hopefully a successful app launch
- Start planning support for the Apple Watch using WatchKit
Previous posts in the series
The code for the project is also available on GitHub
14 Mar 2015
We’re getting close to shipping the app I’ve been blogging about, so there’s a few bugs to fix and housekeeping tasks to be done first, to get everything closer to production quality.
Switching back to Xcode 6.2
I couldn’t get the deployment tools working in Xcode 6.3 beta (not surprising I suppose), so I decided to switch the code back to the recently released Xcode 6.2.
This also meant changing the Swift code back to the previous version too which was a bit of a pain, but in reality all this meant was getting rid of the new - but slightly confusing IMHO - casting commands of as? and as!
The only other change was replacing the much improved count(string) function to get the length of a string with the rubbish countElements(string). Surely an extension method on the String class to get the length should be in the language (or have I missed something?)
You can see from the commit on GitHub the changes I made.
Integrating Fabric
I’ve also integrated Twitter’s Fabric framework for tracking bugs. They had a slightly strange installation program that’s somehow watched Xcode for builds, which doesn’t seem particularly reliable, but I think it’s now all set up correctly. Hopefully this relatively simple app won’t have any crashes, but good to know I should be able to diagnose them if it does.
Bug fixes
I’ve been using the app over the last week or so, and have made a few more improvements:
- Added a timer that fires at midnight each night and refreshes the view, just in case the app is running overnight and needs updating
- Picked a new color palette from paletton.com to tweak the color scheme
- Improved the layout of the main screen so it works better on larger screens - basically set the main control to have a fixed margin from the edge, and have a 1:1 aspect ratio rather than a fixed width and height. This means it scales better on larger screens as well as all the standard phone screen sizes.
- Added a shadow on the main control to get away from a totally flat view. Makes a surprising difference in improving the UI
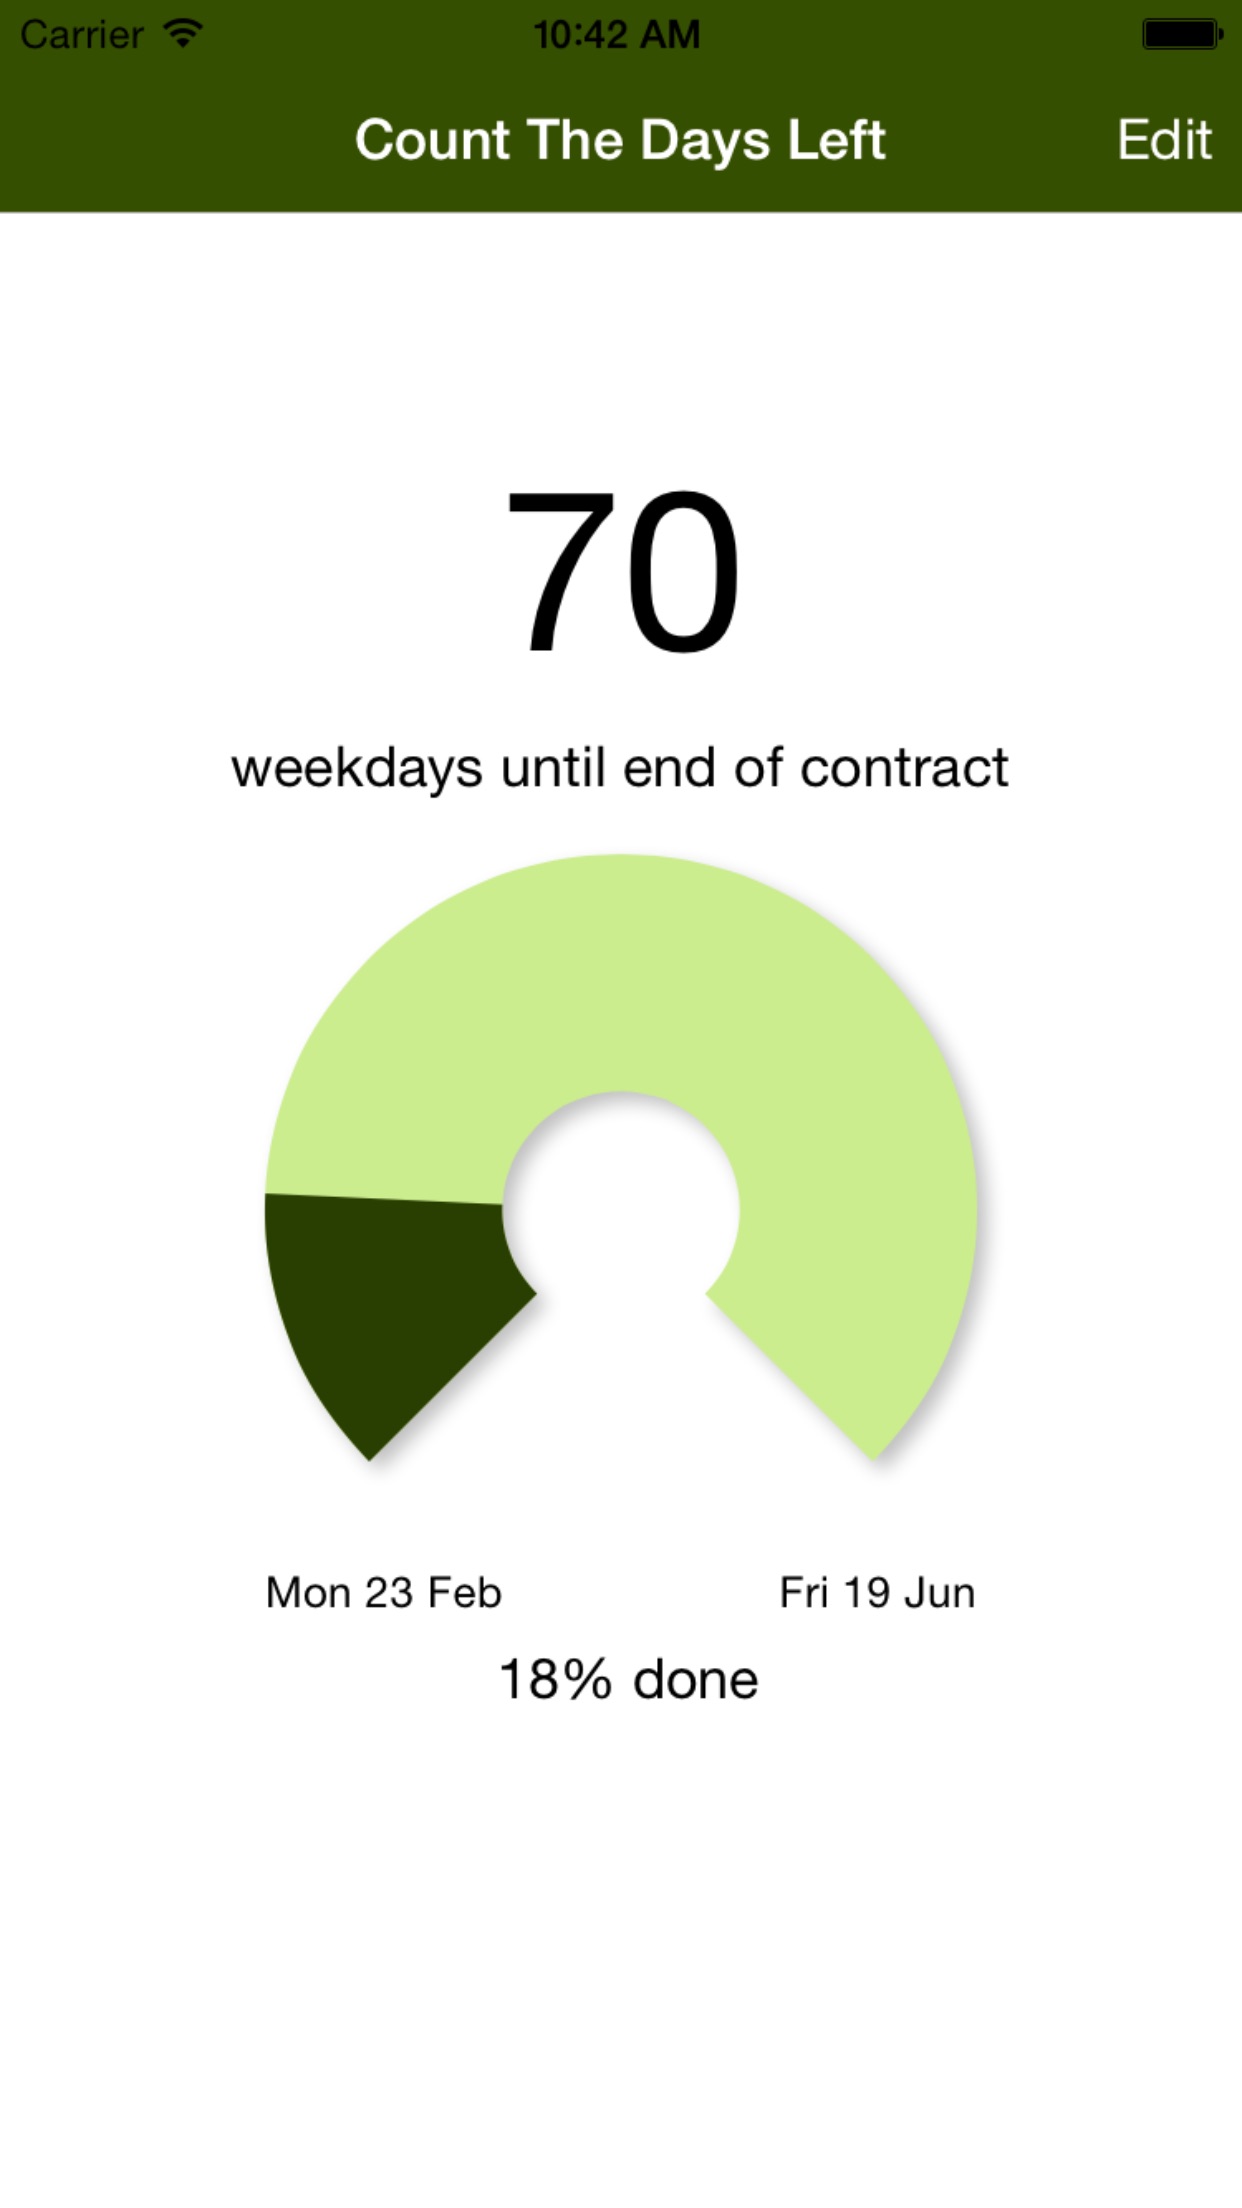
Screenshots
I used the excellent LaunchKit to take the screen shots I’d take from the emulator and automatically produce the different sizes needed for the App Store. Will definitely use them again as it was efficient and quick.
Here’s what the main screen now looks like on my phone:
Next steps
- Final App Store preparations - basically the copy for the app description needs writing
- Test the beta version via TestFlight - let me know if you want an invite
- Start planning support for the Apple Watch using WatchKit
Previous posts in the series
The code for the project is also available on GitHub
09 Mar 2015
Been slower going now I’m in a contract again - need to get paid!
However I’ve finally got around to fixing the algorithm I was using to calculate the number of weekdays between two dates.
I knew the original one I’d found via a web search was wrong, as I could see the results were wrong when calculating how many days left in my contract. I wrote a failing unit test to capture the issue, and then set about using my brain instead of taking other people’s code for granted.
The algorithm
As ever the code is the most succinct way of describing the solution, but as a basic outline the steps are these:
- Adjust the start and end datetimes to be the start of the day
- If the start date is a Saturday or Sunday, move it forward to the next Monday (SAdj)
- If the end date is a Saturday or Sunday, move it back to the previous Friday (EAdj)
- Calculate the days between the adjusted start and end dates (EAdj - SAdj).Days = AdjTotalDays
- Calculate the full weeks between the adjusted start and end dates (AdjTotalDays / 7) = AdjWeeks
- The tricky bit - Get the day of week (using Apple’s numbering of 1 == Sunday…7 == Saturday) for EAdjDayOfWeek and SAdjDayOfWeek
- Calculate EAdjDayOfWeek - SAdjDayOfWeek = DaysDifference
- If DaysDifference < 0, then DaysDifference += 5 (this is to adjust how the week wraps around the weekend)
- Finally, return (AdjWeeks * 5) + DaysDifference
I think this is correct, and all my unit tests show the model now behaves as I expected, so I think we’re all good!
Next steps
I’m ready to let people start beta-testing the app, but because I’m using a beta version of Xcode I can’t use TestFlight and the iTunes Store.
However this might be a good time to check out Twitter’s dev support including Crashlytics and their Beta distribution support.
Previous posts in the series
The code for the project is also available on GitHub
01 Mar 2015
More progress of sorts, and getting close to having a beta release ready for testing.
Animation in Swift
I wanted the progress to dynamically slide in when the progress bar was shown, and this was done pretty easily using a standard CABasicAnimation on the “strokeEnd” of drawing the line. The code needed to be refactored a little to use layers instead of straight drawing of the line, but again nothing really of interest to show (so looking at the code is clearest if you’re interested)
I tried adding Facebook’s lovely Pop Animation framework, but this was very problematic as it’s an Objective-C library. I nearly got it working before giving up, but will definitely post more on this subject when I try again later.
Other bits and pieces
I also added a swipe left gesture to go from the main screen to the settings, made a simple logo and also added the percentage done to the today widget - I’ve been using the app this week as I’ve started a new contract which has been helpful to improve the interactions.
Next steps
Unfortunately it looks like there is a bug in the “weekdays only” calculations. I have a unit test to prove it, so need to fix this before I’m happy to send out for testing.
Previous posts in the series
The code for the project is also available on GitHub
22 Feb 2015
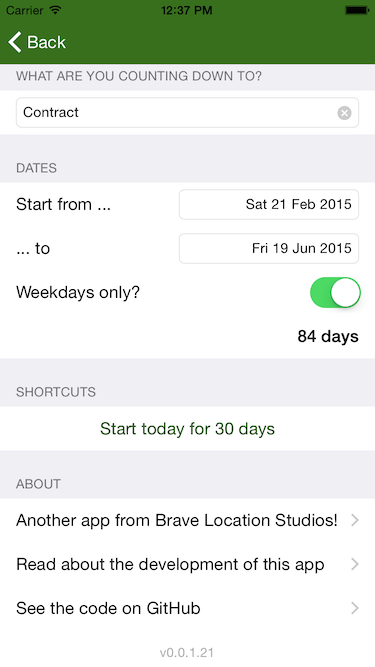
Lots more tweaks of the UI, in particular making a better Settings page.
It’s a pretty straightforward static table view, but there were a few things I learnt/remembered along the way that are worth sharing here.
Selectors in Swift
Installing the app on my iPad exposed a bug I’d introduced in a selector - just shows you can’t always believe everything you read on StackOverflow!
Setting up the handler for incoming notifications, you need to add a colon to the end of the method name in the selector e.g.
NSNotificationCenter.defaultCenter().addObserver(self, selector: "updateKVStoreItems:", name: NSUbiquitousKeyValueStoreDidChangeExternallyNotification, object: store)
Also on the function being selected, you need to annotate the function with @objc so it can correctly interact with the Objective-C library code calling it
Custom data entry for text
I wanted a simple way of entering dates, as I stated in an earlier post simply adding a DatePicker to the page is pretty ugly and takes up a lot of screen.
The solution is to show the dates in a textbox, but then setting the inputView of the text box to be a DatePicker.
// Setup the date pickers as editors for text fields
self.textStart.inputView = self.startDatePicker

Obviously you have to take care in calling self.view.endEditing(true) as appropriate when other elements are selected, but it’s a neat solution that works well.
Setting the build version automatically
I can’t remember where I found this originally, but I’ve used it in projects before. Basically I want to set the build number automatically based on the Github revision number, so I can call it in the code.
The trick is to add this script as part of the “Run Script” you can set in a target’s Build Phases
git=`sh /etc/profile; which git`
appBuild=`$git rev-list --all |wc -l`
/usr/libexec/PlistBuddy -c "Set :CFBundleVersion $appBuild" "${TARGET_BUILD_DIR}/${INFOPLIST_PATH}"
echo "Updated ${TARGET_BUILD_DIR}/${INFOPLIST_PATH}"
You can then use this to add a version number to your display:
// Add version number
let infoDictionary = NSBundle.mainBundle();
let version = infoDictionary.objectForInfoDictionaryKey("CFBundleShortVersionString") as! String;
let build = infoDictionary.objectForInfoDictionaryKey("CFBundleVersion") as! String;
self.labelVersion.text = String(format: "v%@.%@", version, build);
Having a version number in the settings can be invaluable when trying to debug customer issues.
Next steps
Add some quality and animations to the counter control
Previous posts in the series
The code for the project is also available on GitHub